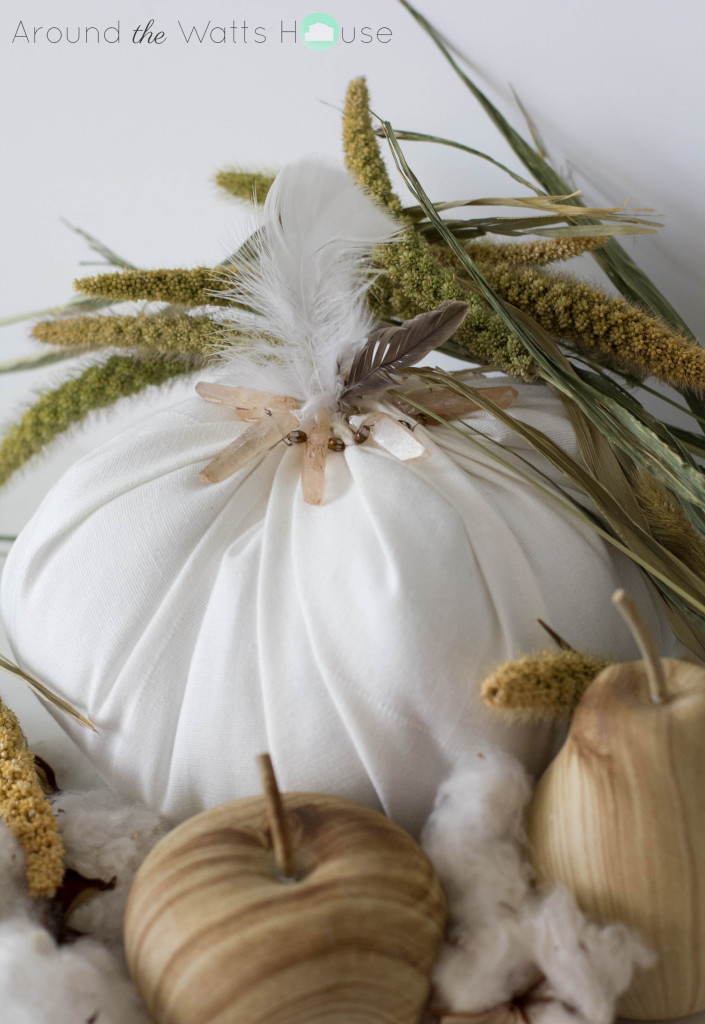
Bohemian Pumpkin (#CraftyFallYall)
A group of wonderfully talented ladies, and myself, are hosting a new hashtag challenge over on Instagram for the next four weeks. It’s called #CraftyFallYall, and we want to see what you can come up with!
Each week we will present a craft based on the category chosen for the week. This week is “pumpkins”.
As you know, pumpkins come in all shapes, sizes, and colors, so the ideas are almost infinite when it comes to creating a craft based on one. After a few brainstorming sessions, trips to the craft store, and a couple of not so wonderful attempts at making a few of those ideas come to fruition, I decided I’d make one more attempt based on a new idea I had come up with. Wouldn’t you know it, it worked, and better than I had expected!
One of my favorite things about crafting, is when a craft comes together organically. Sure I had a basis of a plan, but the pattern of the beads with the crystals, the copper bead wire I had to run out and get because the twine I had intended on using wasn’t thin enough to fit through the beads (Haha, oops!) weren’t part of the plan at all. Even still the project took me where it needed to, and I think it’s much nicer than I had planned on it being.
I completely understand if that sound like a messy process, but a lot of the time, when I’m coming up with my own craft, that’s how it works.
Lucky for you, you don’t have to do all that work! All you have to do is follow the instructions below, to get this look for yourself!
Supplies Needed:
Fabric-Your choice! I used fabric from an old white curtain.
Twine
Fiber Filler
Needle (Large and Small Eyed)
Bead Wire (Bronze) See here for other colors.
Crystals ( Michael’s (Bead Gallery-MSKU#10436618) Similar here.
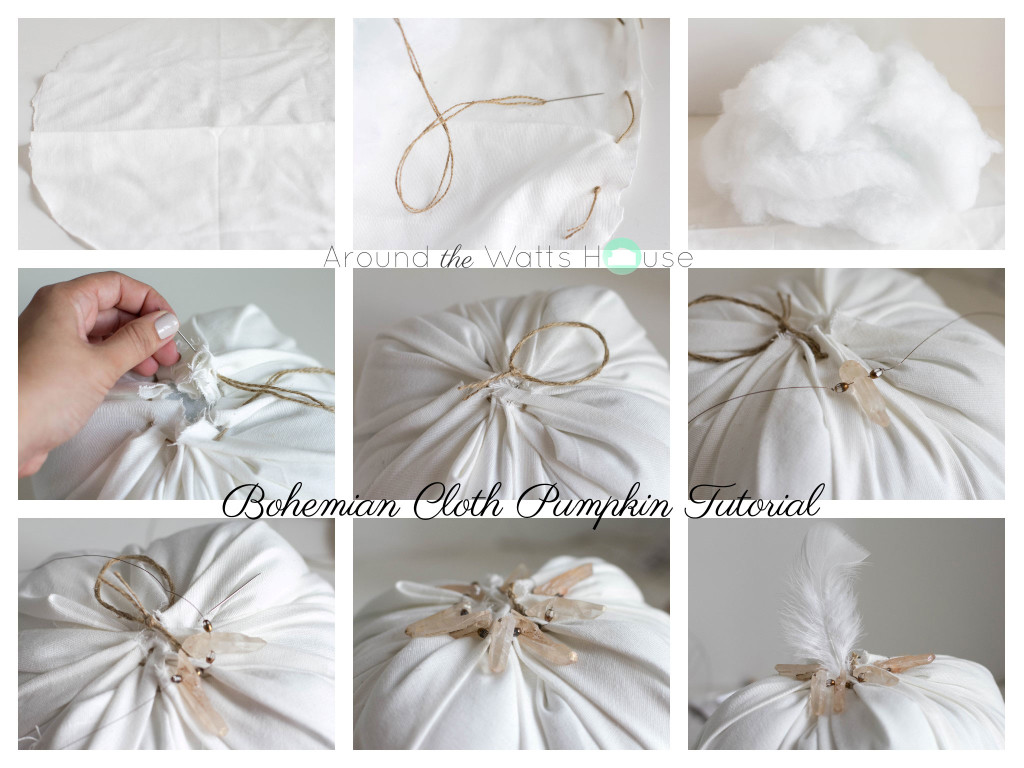
1. Start by cutting the fabric into the shape of a circle.
2. Next, thread your large eyed needle with your twine, and stitch through the fabric, just inside the perimeter of the circle.
3. Add fiber filling.
4. (Optional) If you feel as though your fabric is bunched too much at the top, you can sew through the pleats to secure them a bit closer to the body of the pumpkin.
5. Pull twine to close fabric around filling, and tie a knot.
6. Determine the pattern of your beads. Here we flanked each side of the crystal with a smaller bead. To achieve this look, tie a knot in the wire, thread a small bead, thread the crystal, and thread a small bead again.
7. Now thread your needle with the wire and sew into fabric. Once you have sewed this set remove the needle, and repeat step 6 and 7.
8. Repeat until you have completed a circle around the upper area of the pumpkin.
9. Add a feather to the top center of the pumpkin. You can glue this on, or sew it in, as I did. (As you can see I opted to use two feathers in the final look. One larger white feather to represent the stem, and a darker colored feather to represent a leaf.)
You see, it’s easy!! Now go and make one for yourself. Just be sure to share a picture of your version with me, because I’d love to see it! Tag me at @irisnacole, and use #CraftyFallYall, so we can all see your work!
-Iris
Linking to the following!


Love it! So gaga over the feathers on the pumpkin! Great tutorial! Pinned!!
Aw thank you Stephanie! I was hunting around the house for a stem, and saw these sitting in my craft pile. Tried them, kept searching, and realized that they were perfect as is, so I ended up leaving them that way. I’m glad you like it too! 🙂