Holiday Wreath-DIY
Friends, this past weekend has taken a toll on the whole family. Rordan came down with a cold, that ended up transferring to me and John, by Monday. Needless to say, we are all exhausted, and praying we are all over it before Thursday. The only good part, is that Rordan has done quite well being sick. Something I’m always thankful for. My number one priority, is to make sure he is happy and healthy, so when he’s down, it hits me in the gut. Still, I thank God for his overall health, and pray for it to continue.
Well, since I couldn’t manage to even keep my head up for very long yesterday, I am very happy to say that I have actually been up and about today, and managed to complete a craft I’ve had brewing in my mind. So many times, I visit our craft stores, and see overpriced, even though they are beautiful, wreaths. I mean, I get it. Some people don’t have the time to make one themselves, or the “skills” to make one, but I simply don’t believe that’s true. This wreath cost me well under $20 to make, and took me about 15 minutes, and that’s only because I managed to burn my fingers with the glue gun, and had to treat them. As for skill, yes, I believe some people have an eye for things, but honestly, you could just copy one that you have seen in a magazine, or even up on those walls in the store. What I’m trying to say is, YOU CAN DO IT!
I hadn’t planned on making a tutorial, but then it hit me, in the middle of making this wreath, that some people just don’t believe they can do this, so why not show them how easy it really is. So as far as materials for this wreath, I already had the glue gun and glue, but I had to purchase a regular sized, plain green wreath from Michael’s, as well as red ornaments, a red bow, and the little “filler” balls. Almost everything is 50% off at Michael’s right now, so that really helped keep the costs down. Hobby Lobby almost always has 40% or more off their items too. If those places aren’t near you, run to your nearest Dollar Tree, or Dollar General for cheap materials. Trust me, most people won’t be able to tell the difference.
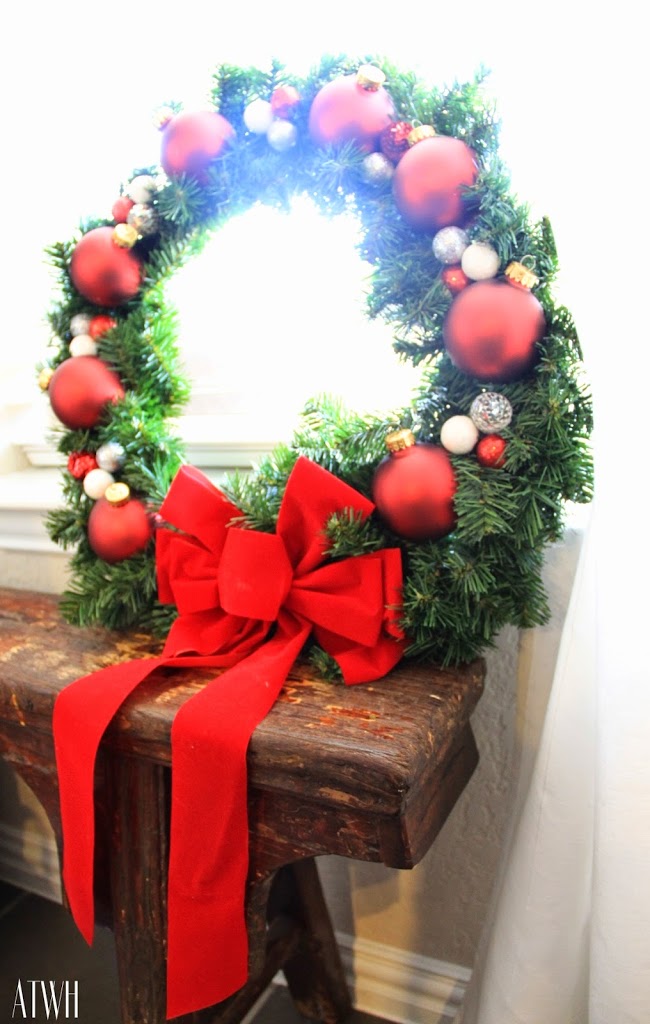
When making a wreath, I like to lay out the decorations before securing them to the wreath, so I can tweak anything I might need to before hand. For this wreath, decided I’d like to alternate between the larger ornaments and the little balls, with a red bow at the bottom, to tie into the rest of the décor where this wreath is going to be placed. Once I decided on this layout, I started to glue them down. Just a little glob on each of the smaller balls, and a good sized glob on the larger ornaments. I like to make sure stuff is secure. I’d hate to pass by one day and see something hanging off or missing completely. Like I said before, I managed to burn my fingers while gluing these down. It was one of the little balls that got me, so please be careful.
And there you have it! A finished wreath, that anyone could enjoy, for under $20! I hope you have taken away from this tutorial, just how easy it is to make a wreath yourself. The possibilities are endless as far as patterns, and materials. Just do what suits you, and I’m sure you will love the outcome. Thanks for stopping by!


This is so pretty! I can’t believe you made this for under $20. I can’t wait to make one too. Thanks for the easy tutorial! Hugs, CoCo
Thank you so much, Coco! It’s really fun to make! Enjoy it! 😀
I’ve been making my own holiday wreath this year too. Yours is beautiful. Yep, I agree with you, it only takes a time to figure out how you want it to look like and the try! Mine only costed the 4.90 euros since I’m using christmas balls I already have ! Bisous bisous. Summer B. from http://www.perfectsummersandiego.com
Thank you so much! I had made a wreath previous to making this one, with old ornaments left over from last year. Now I have two wreaths for under $25! It’s so nice to not have to pay a lot to have something you love. 🙂 Do you have a photo of your wreath online? I’d love to see it! 🙂