Dining Room Makeover
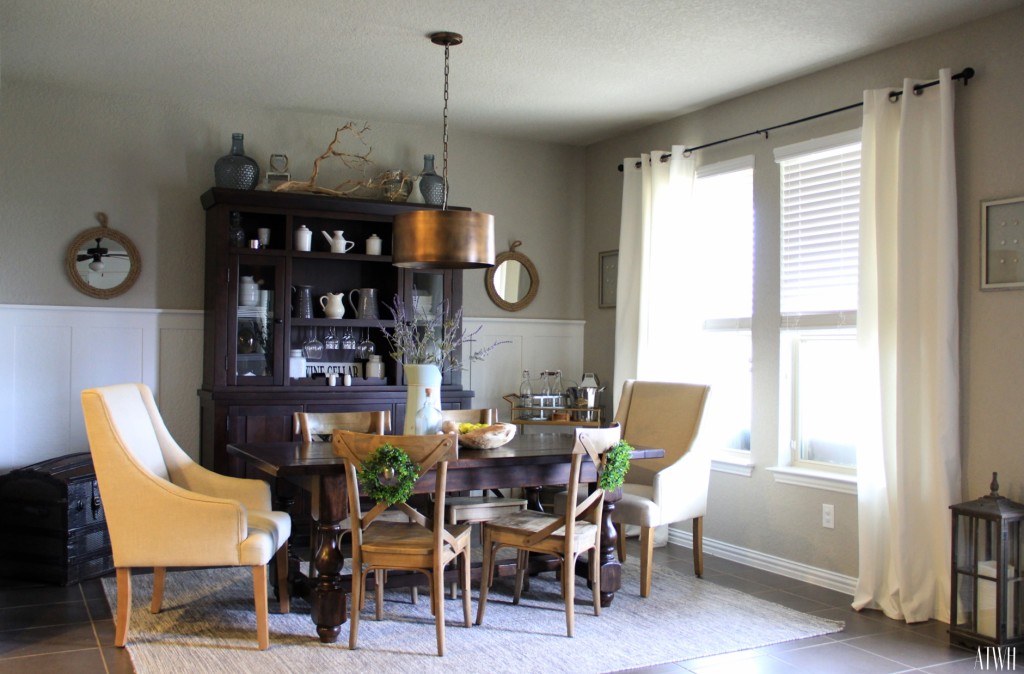
Hello friends! Welcome back to the blog! I’ve been a busy bee this past week, working on our Dining Room. I might have explained before, but it’s not actually a full room. The builder of our home designed the space as a breakfast nook, but it’s so large that we opted to have our official “Dining Room” made into an office, and our “Breakfast Nook” into our Dining Room. Follow? Haha! It was one of the major selling points when we decided to build this plan. We really like it too. It’s open to the kitchen, and living room, so anytime we are entertaining guests we can be in any of these rooms and still carry on a conversation.
One thing I’ve wanted to attempt for about a year now, is to add faux board and batten to the wall. Well, I decided last weekend to go ahead and attempt to do it myself. I went to Home Depot, had them cut down a few sheets of MDF in to 4’x4″ strips. They were only $6 each, so I had them cut down four sheets, but I think I only used two and a half. Either way, that’s only $24 in materials! Okay, you have to add liquid nail, caulk, wood filler, and all that other fun stuff, but luckily I had all of that on hand from past projects. I would estimate that it wouldn’t go over $50 though, if you had to buy it all. Well, I got it all home and started to lay it out to get a feel for how it looked. John and I agreed that it looked nice, and decided to go ahead with the project. Some of you might have picked up on my impatience to complete a project. Once I start I really like to get it done as quickly as possible. I pretty much had it all up by the next day. I painted it using a white paint that matched our baseboards, but once it was all painted I felt like the white was too white. It was distracting, and did not compliment any of the furniture in the room. Instead of getting a whole new dining set (kidding of course) I opted to go back to Home Depot and pick up a different white (Behr Nano White). I’m so glad I did, because it’s perfect now!
I used the same paint color that we used in our entry and living room, Behr Perfect Taupe at 50% on the walls, to tie all the rooms together. I find it hard to have different colors throughout the space, because of how it’s all connected. Believe me, I’ve painted these walls about five times in the past three years and it’s always looked odd with an accent wall. Honestly, I think John is happy that I’ve finally settled on this color, and plan to keep it. He really likes the shade too, so that’s a plus! Once I got the space painted I could see how open it feels, even though I have a ton of pieces in it. I used to think my table was huge, but it almost looks small now that the wall behind it is lighter.
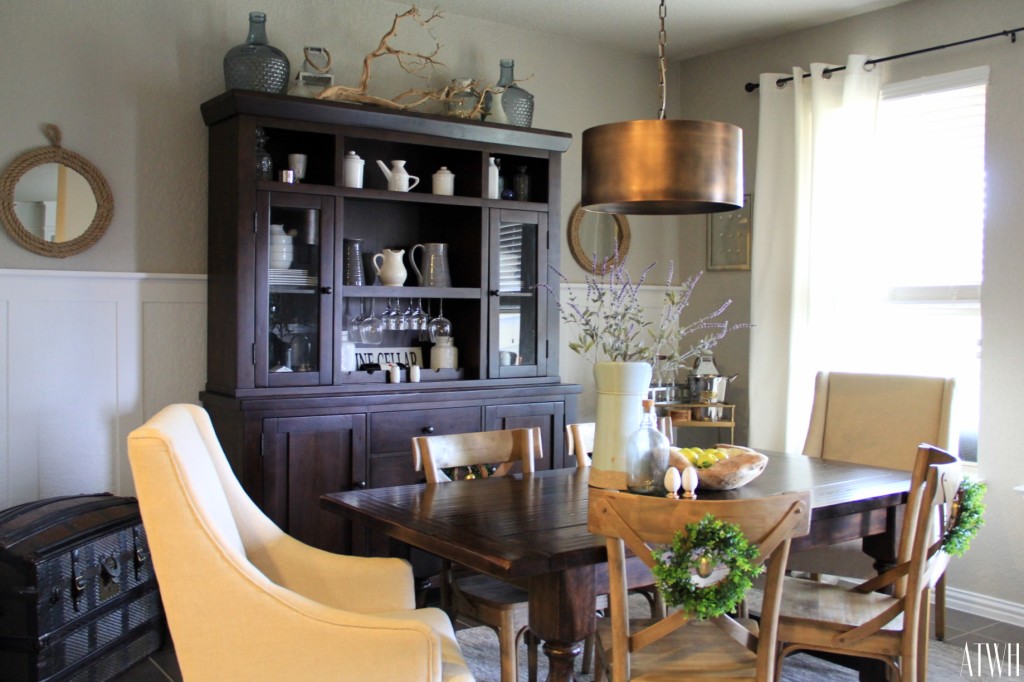
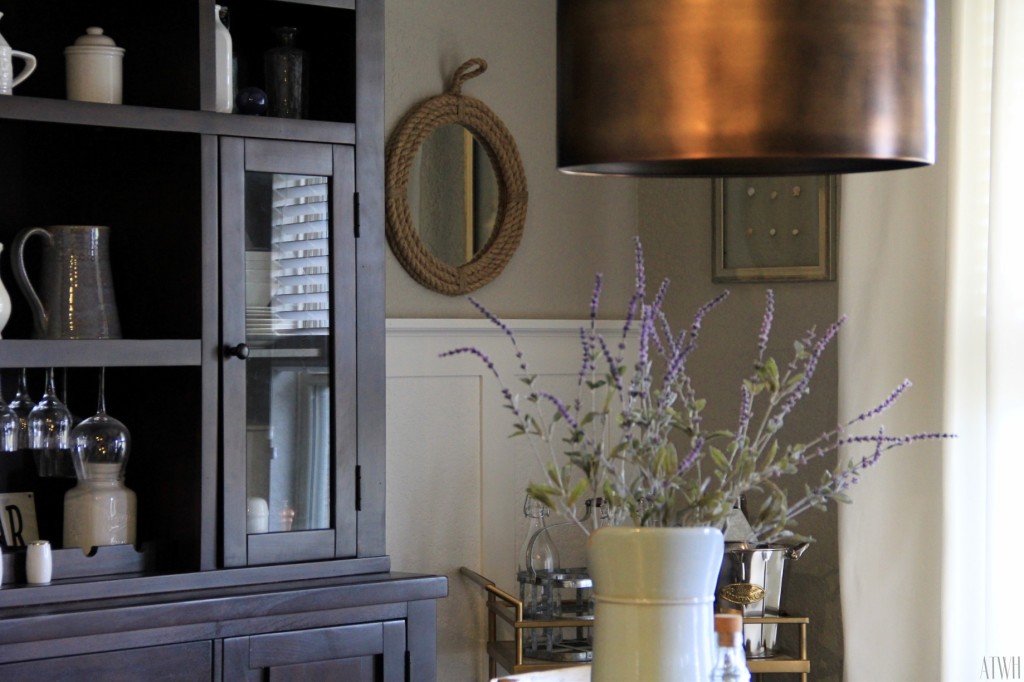
Of course you probably know by now that I love coastal decor, so I wanted to add some pieces to this area to tie it into the rest of the house. I added the rope mirrors which I found on Target.com. When it was time to actually purchase them, they had a promotion going on so I saved 10% on the order. You know I love to save! I made two art displays from small shells we had collected on past beach trips. I just glued them to a pane of glass, and stuck them in a frame. It was pretty easy, and cost under $10 to make them both. I also added that awesome piece of drift wood to the top of the hutch. I found it at Home Goods, and thought I could use it as wall art, but the branches stuck out too far for my taste. I really didn’t want to return it so when the idea popped into my head to try it on top of the hutch I got really excited. John was kind enough to help me put it up, and move it around until I thought it was just right. Honestly, it’s different, but I love it! Funnily enough, once we put the room back together John commented on the “country” feel of the room. I thought it was funny, because obviously it’s not what I was going for, but I can see it, especially on the table, and I really like it. I’m happy to keep it like this for a while, but I’m still working on it reading as coastal. Maybe this Summer I’ll change it around a bit! I’m still looking for a piece of art for the left wall, so who knows, that might do the trick!
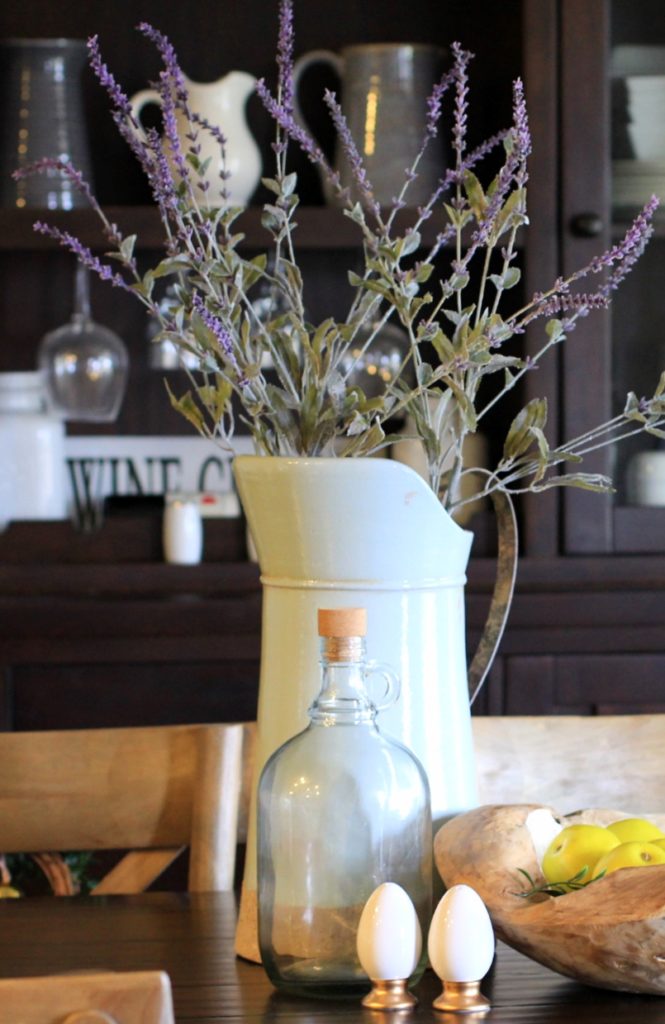
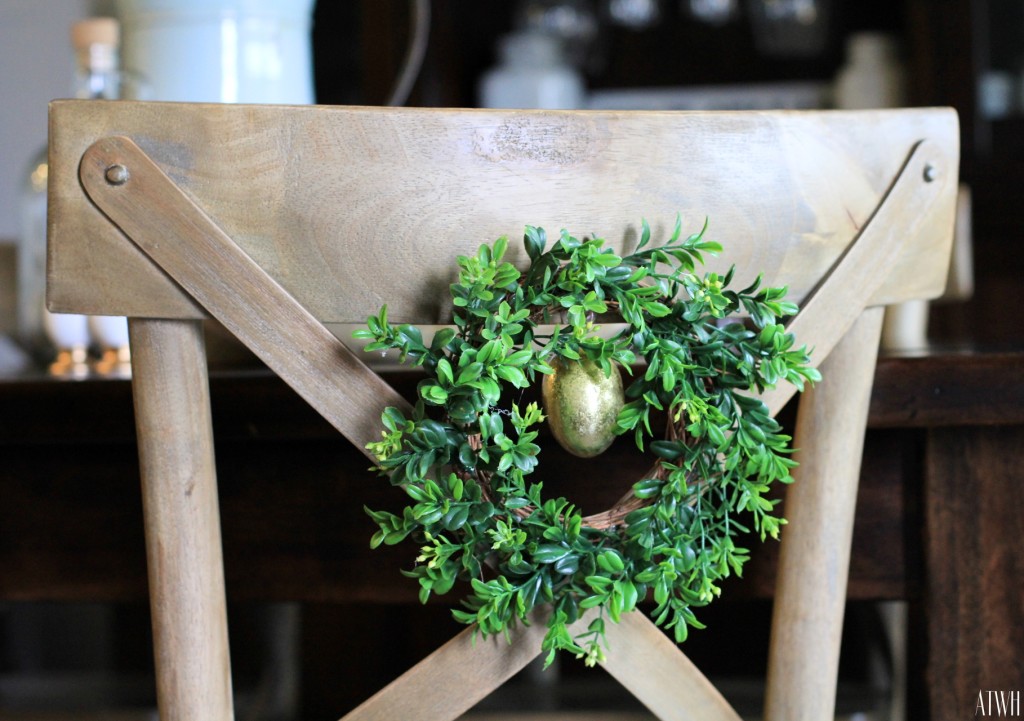
Since Easter is around the corner, I added these adorable little egg-shaped salt and pepper shakers to the table. Did you know I collect salt and pepper shakers? I didn’t know it myself for a long time, but once we started moving things around, I found that I had quite a few sets. Sometimes you just have to buy those cute little things! These were only $5 from Home Goods, so it was a no brainer for me. I also added some faux lavender to my pitcher to bring in a bit of Spring. It’s almost here! The back of the chairs are still sporting the wreaths I made for Valentine’s Day, only they have golden eggs on them instead of the little tags from before. Such an easy change!
So there you have it. One big change (and a few smaller ones) has really transformed this room, and I couldn’t be happier. Don’t be afraid to experiment with your home. After all, it’s yours and you should be happy with it. Thanks for stopping by!
~Iris
Iris this is beyond fantastic! It’s like a totally different room. I love how much texture and depth it added to the entire space. You nailed it! Hugs, Coco
Thank you Coco! I really appreciate your lovely comments! I really wanted this to be a challenge to myself, to see if I could in fact design a room from scratch. I’m so glad it worked out! 🙂
Iris – I am so impressed as always! This is gorgeous! I love how you did it yourself and what a beautiful touch. Your style is lovely along with your dining set! It has been so much fun to see your projects – I love them all.
Thank you Annie! I really appreciate your kind words. 🙂
Oh Iris, It is so gorgeous. Bravo my friend. I want to put up the boards too. Maybe I’ll do it???
Thank you Deborah!! I say go for it! It wasn’t that expensive, and it didn’t take long. Just test your paint colors before to save time and money. LOL! I knew this and didn’t do it. Cost me a whole can of paint! Haha!