New Year, New Room Refresh Challenge-A Multi-functional Bonus Room (Week 2)
Welcome back, friends! It’s week two of the New Year, New Room Refresh Challenge, and I’ve been a bit busy pulling together some of the final elements of the space. I’m so looking forward to working with the sponsors of the challenge, and can’t wait to share the products I’ll be using in the room with y’all! I’m saving that for a different day though. Today we’re going to have a look at the media wall makeover. I took these pictures as we worked on it, so they aren’t the greatest, but you will get the idea from them at least.
As a refresh, or for those of you new to the challenge these are our overall plans for our bonus room. You can read more about it in my first post, here.
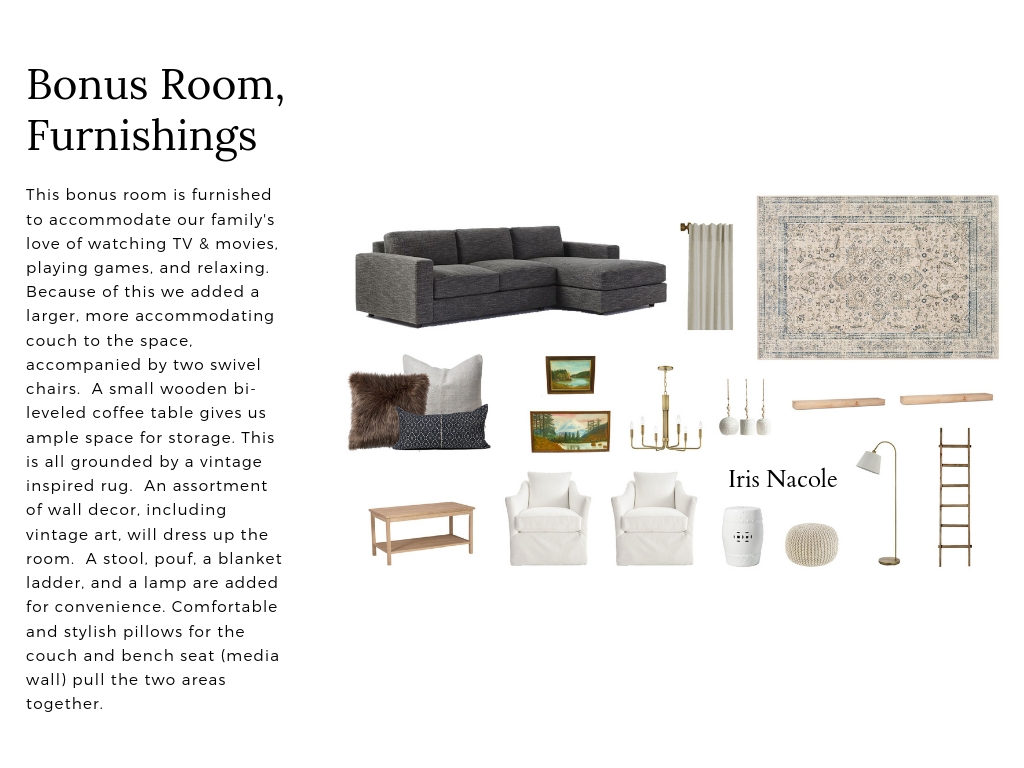
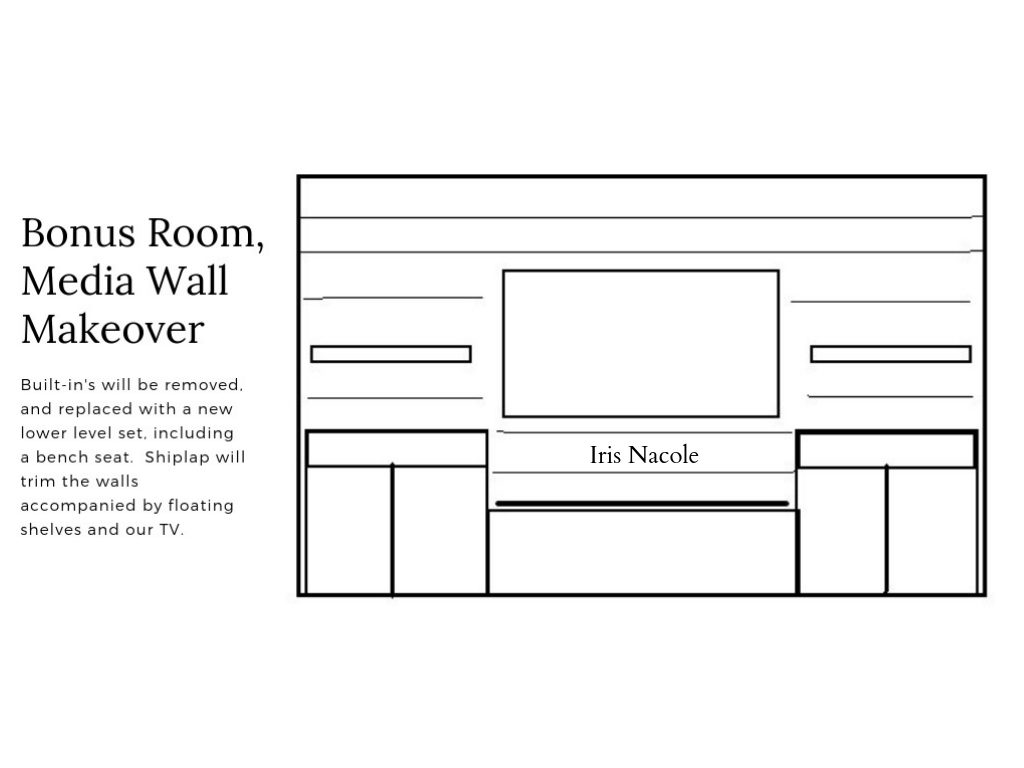
I couldn’t find pictures of the faux shiplap installation, but we basically cut 1/4 inch mdf pieces down into I believe five in wide strips, and applied them in a staggering pattern across the wall using a nail gun. Once that was done we painted it to match the rest of the space.
To complete the built-in look we purchased prefab cabinets from Lowe’s. Two base cabinets and two upper cabinets to make the bench seat.
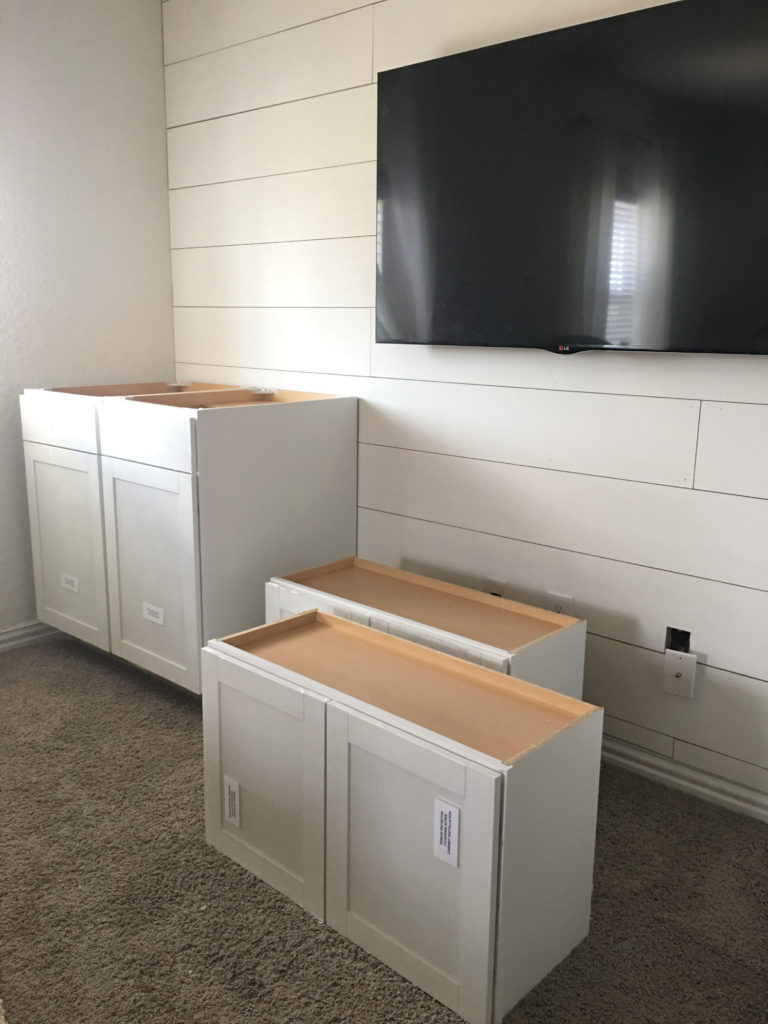
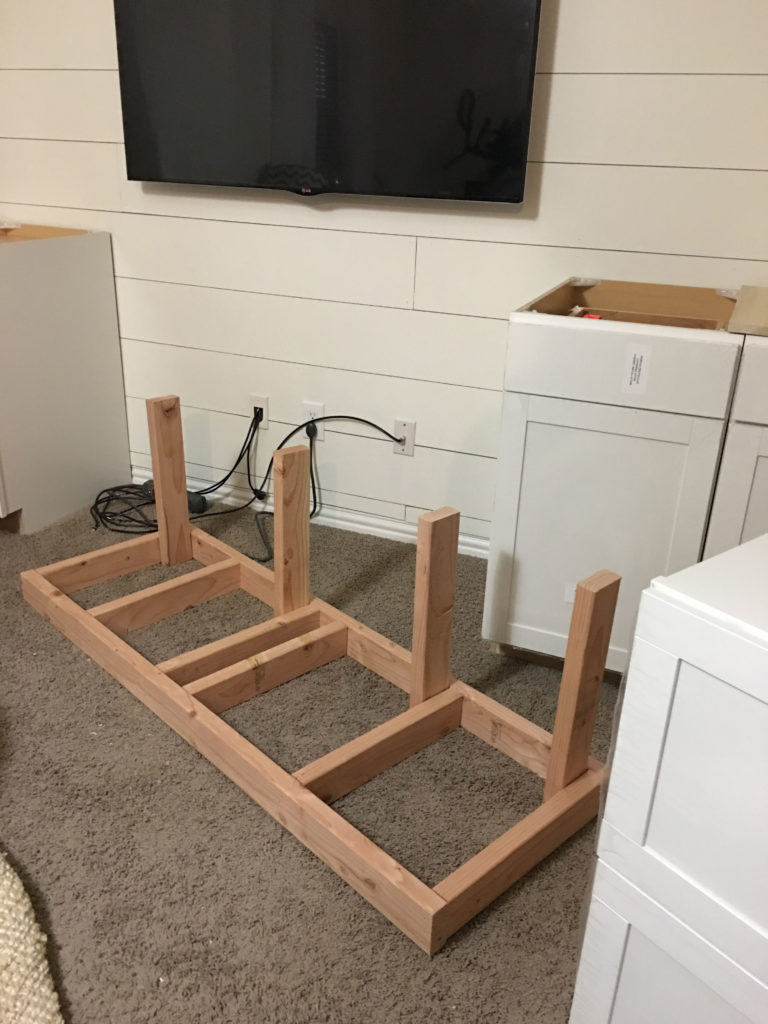
Since the upper cabinets don’t have a base, we made one our of some extra wood we had from previous projects. It will vary for everyone depending on the space you are filling, but it isn’t hard to build. What you want to make sure of the most is that you create support for the weight that the cabinets will be holding. This is why you see that we have the back pieces going up the build. The actual upper cabinets aren’t very deep, but by adding the supports, we were able to give ourselves a bit more depth.
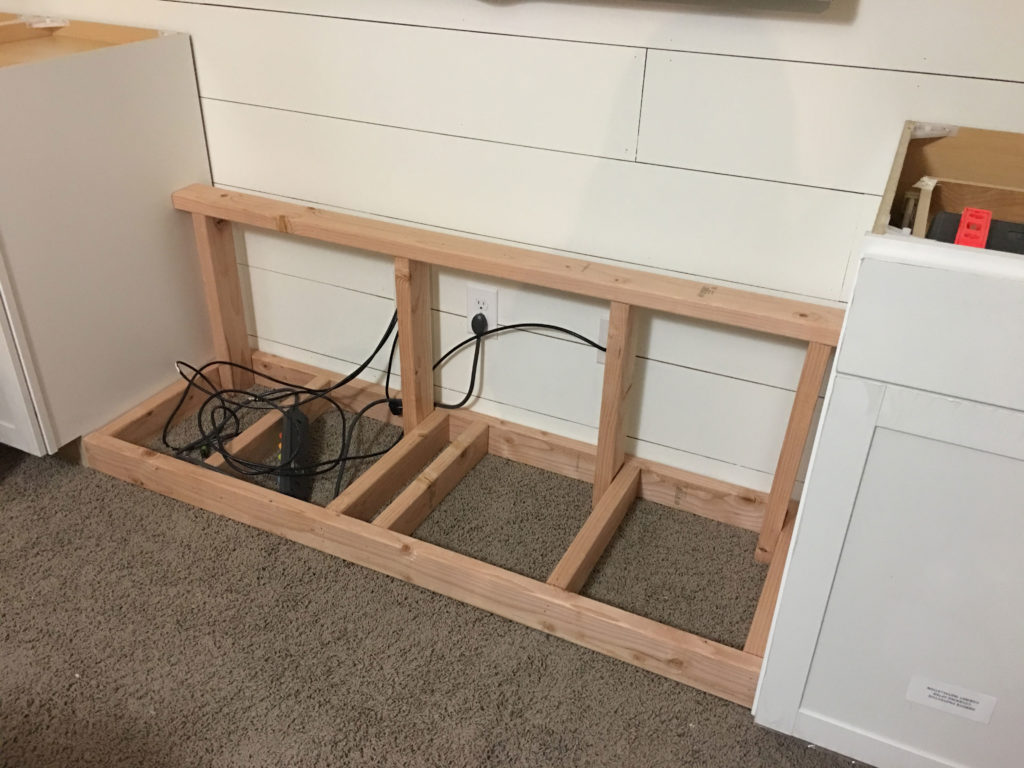
Once the piece was placed between the two base cabinets, we were able to attach the frame to each side. You can see that the front board now sits flush with the base of the two base cabinets. We placed the two upper cabinets in their place onto the frame and attached them with screws. The next step was to add the countertops to the cabinets and new bench seat. We again used mdf, but 1/2″ this time. Again, these were installed by attaching them with screws from under the cabinets. The top of the bench seat is not attached though. We have our outlet under there, and want to be able to access it whenever we may need to. A couple of coats of paint later, and the piece was ready to go.
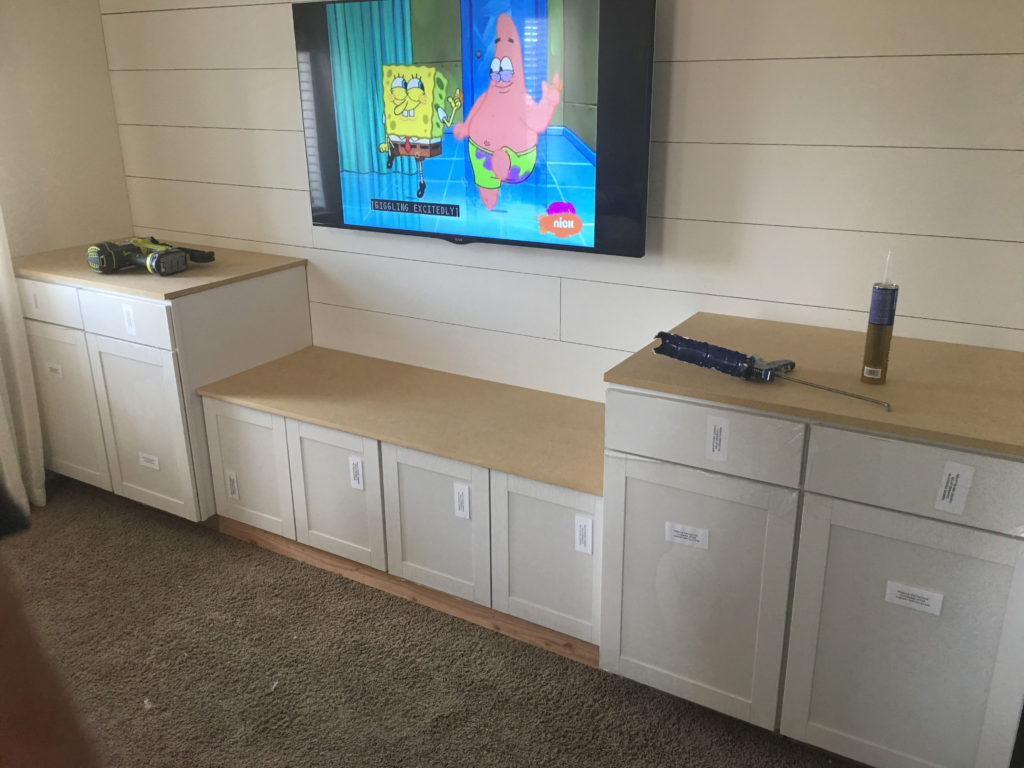
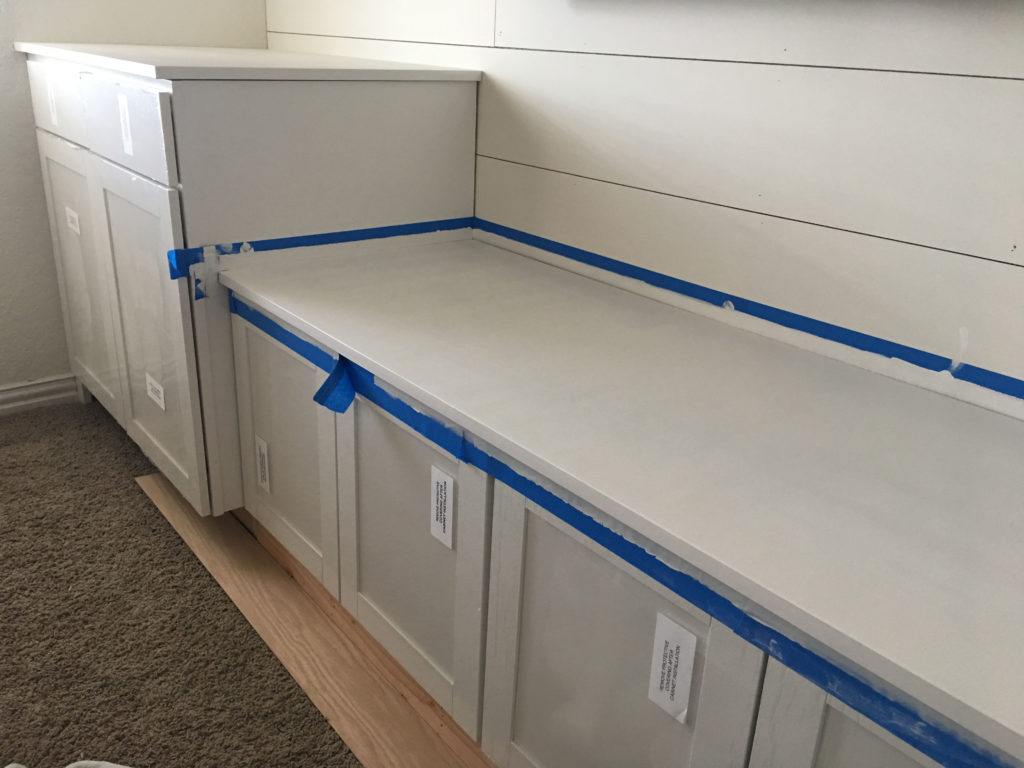
Having lived with it for a while this way, I’ve been toying with the idea of adding a wood top and staining the wood, so that’s still a possibility before the reveal. Of course, I’ll let y’all know if that ends up being the case.
Check back with us next week for more!
-Iris
Casa Watkins Living // Domicile 37 // House Homemade // Iris Nacole // Monica Wants It //
Jeweled Interiors // Pocketful of Posies // This Is Our Bliss // Up To Date Interiors

Love seeing real progress! This is going to be GREAT!!
The built in looks great!! I’m hoping to tackle something similar in our office this spring. 🙂
OOOOOOOOO I can’t wait to see this Iris! You always take a refresh over the top. LOL! I love it. Meanwhile, the spongebob cartoon made me laugh.
Those built ins are game changing! Looking so good!
This is such a fab idea to use cabinets! Genius my friend!
You all did such a fab job with this project! I adore your crisp, clean style.